
ThereS an art to making the perfect tortilla-warm, flexible, and just the right balance of tender and chewy. But for those embracing a gluten-free lifestyle, crafting that ideal wrap can sometimes feel like chasing a culinary unicorn. Fear not: weather you’re navigating gluten sensitivities,allergies,or simply exploring new tastes,this step-by-step guide will unlock the secrets to creating flawless gluten-free tortillas at home. From choosing the right flour blends to mastering the cooking technique, get ready to transform simple ingredients into soft, flavorful tortillas that will elevate every meal and satisfy every craving.
Crafting perfect gluten-free tortillas unlocks a world of rich, soft, and flexible flatbreads that rival their customary counterparts. The secret lies in selecting the ideal gluten-free flours,achieving the perfect dough elasticity,and mastering cooking techniques to prevent cracking or sticking. Whether you’re recreating a family favorite or exploring new culinary horizons, these tortillas promise a appetizing, versatile base for tacos, wraps, and more.
prep and Cook Time
- Prep Time: 15 minutes
- Cook Time: 20 minutes
- Total Time: 35 minutes
Yield
8 medium-sized tortillas (6-7 inch diameter)
Difficulty Level
Medium – Ideal for home cooks ready to elevate their gluten-free baking skills.
Ingredients
- 1 cup tapioca starch – for stretch and chew
- ½ cup brown rice flour – for mild nuttiness and body
- ¼ cup sorghum flour – adds subtle sweetness and structure
- 1 tsp xanthan gum – essential for elasticity and hold
- 1 tsp baking powder – gently lifts the dough
- ½ tsp fine sea salt – enhances flavour
- 2 tbsp olive oil – adds moisture and pliability
- ¾ cup warm water (approximate) – binds the flours
Instructions
- Combine Dry Ingredients: In a large bowl, whisk together tapioca starch, brown rice flour, sorghum flour, xanthan gum, baking powder, and salt until fully incorporated.
- Add Wet Ingredients: Pour in the olive oil and warm water little by little,stirring with a wooden spoon until a soft,slightly sticky dough forms. use warm water to help the flours hydrate evenly.
- Knead gently: lightly flour a clean surface with tapioca starch. Turn out the dough and knead gently for 1-2 minutes until smooth and elastic. It should feel soft but not crumble.
- Rest the Dough: Cover the dough with a damp cloth or plastic wrap and let it rest for 20 minutes. Resting allows the starches to absorb moisture, improving flexibility.
- Divide and Roll: Divide the dough into 8 equal balls. Sprinkle tapioca starch on your work surface and rolling pin. Roll each ball into a thin, even circle about 6-7 inches in diameter. Keep flouring lightly to avoid sticking but avoid using too much to prevent dryness.
- Cook Tortillas: Heat a non-stick skillet or cast-iron pan over medium-high heat.Once hot, cook each tortilla for 30-40 seconds on the first side until bubbles appear and the surface looks set.
- Flip and Cook: Flip the tortilla carefully and cook for an additional 20-30 seconds until golden spots form but avoiding overcooking, which can cause cracking.
- Stack and Cover: Remove cooked tortillas and stack them on a plate covered with a clean kitchen towel to retain moisture and softness.
Tips for success
- Flour Blend Matters: Tapioca starch is the glue that gives stretch, but it’s the combo with brown rice and sorghum flours that offers body and flavor. Avoid relying on just one flour to achieve the soft, pliable texture synonymous with great tortillas.
- Hydration is Key: add warm water slowly-too much can make the dough sticky; too little will dry out the tortillas. The dough should be supple, not crumbly or overly sticky.
- Resting is Essential: Allow the dough time to relax and hydrate. This step significantly improves flexibility and foldability.
- Cook on Preheated Pan: A properly heated, dry non-stick or cast-iron skillet prevents sticking. Avoid adding oil to the pan.
- Watch Cooking Time: Overcooking makes tortillas brittle and prone to cracks; undercooking leaves dough raw and floppy.
- Storage Tips: Store leftovers wrapped tightly in foil or plastic wrap. Reheat on a skillet or microwave with a damp paper towel to regain softness.
Serving Suggestions
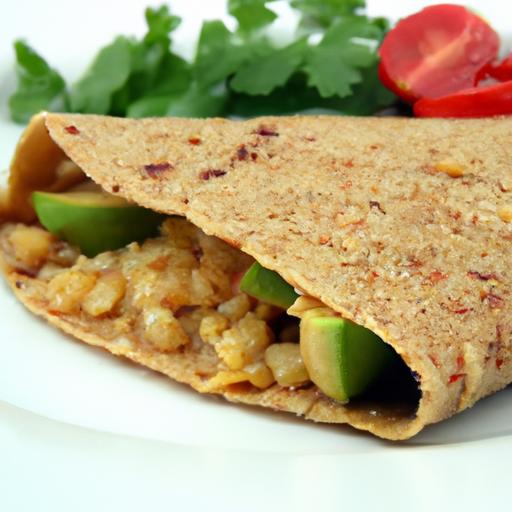
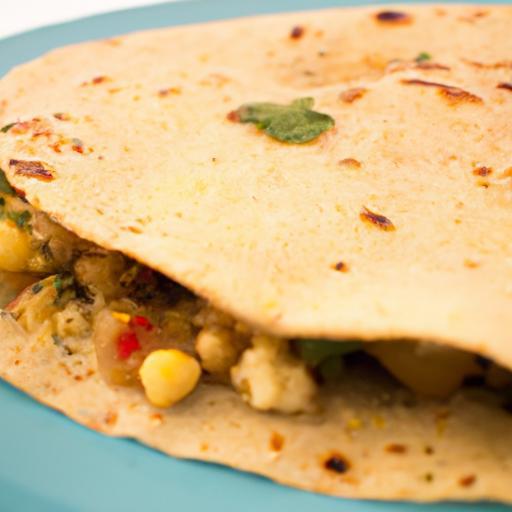
these gluten-free tortillas are a perfect canvas for vibrant, fresh flavors. Fill them with grilled vegetables, smoky chipotle black beans, avocado slices, and a bright cilantro-lime slaw for a satisfying vegetarian taco night. Alternatively,wrap them around your favorite roasted chicken salad or falafel for a quick lunch. Garnish with lime wedges, fresh herbs, or a drizzle of creamy cashew sauce to elevate presentation and taste.

| Nutrient | Per Tortilla |
|---|---|
| Calories | 110 kcal |
| Protein | 2 g |
| Carbohydrates | 22 g |
| Fat | 3 g |
For those interested in expanding their gluten-free baking skills beyond tortillas, check out our guide on gluten-free bread making. For detailed science behind gluten-free flours, the Celiac Disease Foundation offers excellent, evidence-based insights.
Q&A
Q&A: Crafting perfect Gluten-Free Tortillas: A Step-by-Step Guide
Q1: Why choose gluten-free tortillas over traditional ones?
A1: Gluten-free tortillas open a whole new world of delicious possibilities for those with gluten sensitivities, celiac disease, or anyone looking to diversify their diet.They offer a lighter, frequently enough more nutrient-rich choice while still delivering that comforting wrap experience.
Q2: What are the key ingredients in gluten-free tortillas?
A2: The foundation is a blend of gluten-free flours such as tapioca, rice, or almond flour, combined with binding agents like xanthan gum or psyllium husk. Add in warm water, a touch of oil, and sea salt for flavor and pliability.
Q3: How do gluten-free tortillas differ in texture from traditional tortillas?
A3: Gluten-free tortillas tend to be more delicate and slightly softer,lacking the elasticity gluten provides. However, with the right flour blend and technique, you can achieve a flexible, chewy texture that’s perfect for rolling or folding.Q4: What’s the secret to rolling out perfect gluten-free tortillas without sticking?
A4: Lightly dust your workspace and rolling pin with a mix of cornmeal or gluten-free flour. Working quickly helps too-gluten-free dough can dry out fast. You can also sandwich the dough between parchment paper to roll evenly without sticking.
Q5: Can I make gluten-free tortillas ahead of time?
A5: Absolutely! Store cooled tortillas in an airtight container with parchment paper between layers to prevent sticking. Refrigerate up to 3 days or freeze for longer storage. Reheat gently on a skillet to regain softness.Q6: What cooking tips ensure tortillas cook evenly?
A6: Use a hot, dry skillet or griddle with medium-high heat. Cook each side for about 30-60 seconds until golden spots appear. Avoid overcooking-gluten-free tortillas can become brittle if exposed to high heat too long.
Q7: Are there any flavor variations to try with gluten-free tortillas?
A7: Certainly! You can add spices like cumin,smoked paprika,or garlic powder to the dough for a savory twist. Fresh herbs such as cilantro or finely chopped chives also add vibrant flavor and color.
Q8: How can I troubleshoot common problems like cracking or stickiness?
A8: cracking often means the dough is too dry-add a little more water, a teaspoon at a time. Stickiness suggests too much moisture; dust your rolling surface generously or briefly chill the dough. Practise helps your intuition develop over time.Q9: Can gluten-free tortillas hold fillings as well as traditional ones?
A9: When fresh and properly cooked, gluten-free tortillas are surprisingly sturdy and perfect for wraps, tacos, and quesadillas. Just be mindful not to overfill or let them sit too long with wet fillings to avoid sogginess.
Q10: What are some creative ways to enjoy homemade gluten-free tortillas?
A10: Beyond classics, try cinnamon-sugar tortillas as a quick dessert, or brush them with olive oil and herbs for impromptu flatbreads. Layer with roasted vegetables and melted cheese for a satisfying gluten-free quesadilla experience. The canvas is yours to explore!
By diving into these FAQs, you’re well on your way to mastering gluten-free tortillas that rival any traditional version-flavorful, flexible, and handcrafted with care.Ready to roll?
To Conclude
Mastering the art of gluten-free tortillas opens up a world of delicious possibilities, proving that dietary restrictions don’t have to limit your culinary creativity. With the right ingredients, a careful hand, and a little patience, you can craft tortillas that are tender, flexible, and full of flavor-perfect for wrapping your favorite fillings or enjoying on their own. Whether you’re a seasoned gluten-free cook or just beginning your journey, this step-by-step guide equips you with the tools to bring authentic, homemade tortillas to your table. So roll up your sleeves, embrace the process, and savor every bite of your gluten-free masterpiece. Happy cooking!