

Baking without gluten is more than just a dietary choice-it’s a delicate dance of science, art, and passion. For those who embrace the gluten-free lifestyle, the kitchen becomes a laboratory where every ingredient and tool plays a crucial role in transforming simple mixes into mouthwatering masterpieces. But navigating this world can be a challenge without the right equipment by your side. From measuring gadgets that ensure precision to mixers designed to handle choice flours,having essential tools tailored for gluten-free baking can make all the difference between crumbly disappointment and perfectly tender treats. Join us as we explore the must-have tools that empower gluten-free bakers to not only survive but truly thrive in their creative culinary pursuits.
Choosing the Perfect Gluten-Free Flours for Flavor and Texture
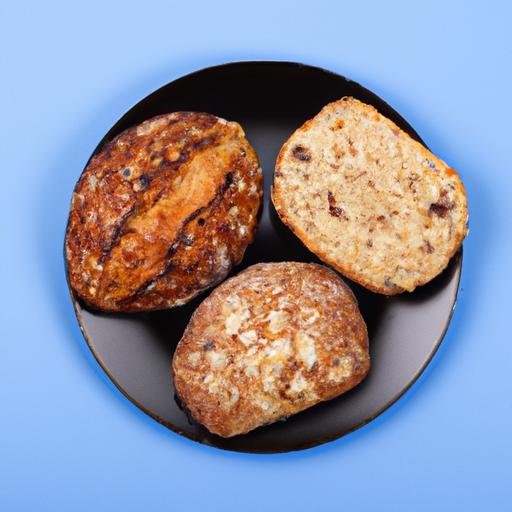
Essential tools every gluten-free baker needs to thrive include knowing how to select the right flours that bring both flavor and the perfect crumb to your baked goods. unlike traditional wheat flour, gluten-free flours each carry unique characteristics, making their combination and balance a crucial step toward success. As a notable example, brown rice flour offers a mild nuttiness and light structure, while tapioca starch adds that much-needed chewiness and elasticity to dough. Embracing a blend, often a mix of sorghum, millet, and sweet rice flours, creates a harmonious symphony of taste and texture that will keep your gluten-free breads, cakes, and cookies from feeling dense or crumbly.
Don’t forget to include a small amount of ground flaxseed or chia seeds-these natural binders help mimic the role of gluten in retaining moisture and giving shape to your dough. When measured precisely, these flours unlock the secret to tender, flavorful, and resilient gluten-free baking, turning what once felt like a challenge into a delightful, creative adventure.
Mastering Measurement with Precision Tools for Consistent Results
Accurate measuring is the backbone of triumphant gluten-free baking. Since some flours absorb moisture differently,even a slight variation can change your recipe’s outcome from perfect to problematic. Invest in a digital kitchen scale to weigh your ingredients in grams for the most consistent results. Alongside, use nested measuring cups and spoons calibrated for dry and liquid ingredients to maintain precision.
Use the “spoon and level” technique for dry flours-gently spoon flour into the measuring cup and level it off with a flat edge instead of scooping it directly, which can compact the flour and add extra weight. Combining these precision methods ensures your dough won’t turn out too dry, sticky, or dense, empowering you to replicate your bakery-quality goods every time.
Innovative Mixers and Bowls Designed for gluten-Free Baking
Gluten-free doughs often have a different consistency than traditional doughs-stickier, wetter, and more delicate. That’s where specialized mixers come in. A stand mixer with variable speed settings and a dough hook attachment designed for high hydration doughs is a game-changer. It allows gentle yet thorough mixing, encouraging smooth elasticity without overworking the dough.
Pair your mixer with a set of stainless steel or glass mixing bowls in multiple sizes,preferably with non-slip bases. These materials do not retain odors or stains-an important feature when juggling various flours and seeds. Bowls with pour spouts and measurement markings simplify adding liquids and transferring dough,while heat-resistant glass varieties allow for safe warming stages when activating yeast or seeds.
Essential Accessories to Enhance Gluten-Free Dough Handling and Shaping
Handling gluten-free dough can feel like an art form,but the right tools make it effortless and enjoyable. Equip your kitchen with silicone spatulas and dough scrapers-both flexible and non-stick-to fold and lift your dough without tearing. A baking mat lined with non-stick materials allows easy shaping and transfer of dough without sticking or breaking.
For precise shaping, bench scrapers help divide dough into equal portions cleanly, while flexible rolling pins designed for sticky dough prevent clumping and maintain smooth surfaces. Lastly, investing in baskets lined with natural linen or proofing cloths helps your dough rise beautifully, adding light texture and lovely patterning to your crusts.

Prep and Cook Time
- Preparation Time: 20 minutes
- Cook/Bake Time: Varies depending on recipe (typically 30-45 minutes)
- Total Time: Approximately 50-65 minutes
Yield
Yields enough batter or dough for 8-12 servings, depending on recipe specifics.
Difficulty Level
Medium – Perfect for those cozy with baking fundamentals, ready to explore gluten-free techniques.
Ingredients
- 1 cup brown rice flour, sifted
- 1/2 cup tapioca starch
- 1/2 cup sorghum flour
- 2 tablespoons ground flaxseed
- 1 teaspoon xanthan gum or guar gum
- 1 teaspoon baking powder
- 1/2 teaspoon fine sea salt
- 3/4 cup unsweetened almond milk (or preferred dairy-free milk)
- 2 large eggs
- 1/4 cup coconut oil, melted
- 1 tablespoon honey or maple syrup
Instructions
- Combine dry ingredients: In a large mixing bowl, sift together brown rice flour, tapioca starch, sorghum flour, ground flaxseed, xanthan gum, baking powder, and sea salt. Use a whisk to ensure even distribution.
- Whisk wet ingredients: In a separate bowl, beat eggs thoroughly, then add almond milk, melted coconut oil, and honey. Whisk until smooth and homogenous.
- Mix wet into dry: Gradually pour the wet mixture into the dry ingredients while mixing on low speed using a stand mixer fitted with a paddle attachment, or mix with a silicone spatula by hand until a smooth, thick batter forms.
- rest the batter: Let the mixture sit for 10 minutes to hydrate the flours and improve texture.The batter shoudl resemble a sticky, cake-like consistency.
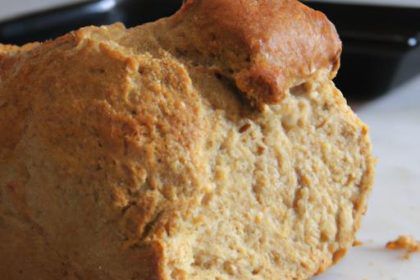
- Shape and bake: Transfer the batter to a greased or parchment-lined baking pan or muffin tins. Smooth the tops with a wet spatula. Bake in a preheated oven at 350°F (175°C) until a toothpick inserted comes out clean, typically 30-45 minutes depending on item size.
- Cool before serving: Allow baked goods to cool completely on a wire rack to set the crumb and develop flavor.
Chef’s Notes
- Flour swaps: Substitute sorghum flour with millet or buckwheat flour for a different flavor profile and nutrient boost.
- Binders: If avoiding eggs,replace with additional flaxseed “egg” (1 tbsp ground flaxseed + 3 tbsp water = 1 egg).
- Storage: Store baked goods in airtight containers at room temperature up to 3 days, or freeze for longer freshness.
- Troubleshooting: If dough feels too dry, add water or milk by the tablespoon; too wet, add reserved flour mix a little at a time.
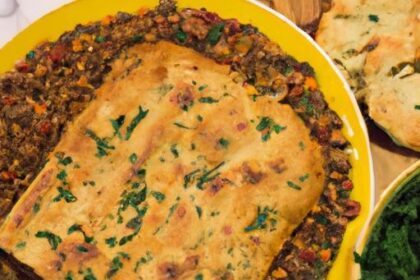
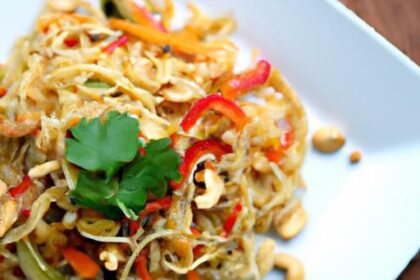
Serving Suggestions
Enjoy freshly baked gluten-free treats spread with creamy nut butter or a dollop of coconut yogurt.Garnish with fresh berries and a sprinkle of toasted seeds to add color and crunch. pair with a warm herbal tea or fresh-pressed juice for a wholesome snack or breakfast delight.
| Nutrient | Per Serving (approx.) |
|---|---|
| Calories | 180 kcal |
| Protein | 4 g |
| Carbohydrates | 28 g |
| Fat | 6 g |
For more tips on gluten-free baking essentials, explore our detailed guide on crafting flawless gluten-free recipes. Also, consult the Celiac Disease Foundation for expert insights on gluten-free diets and safe ingredient sourcing.
Q&A
Q&A: Essential Tools Every Gluten-Free Baker Needs to Thrive
Q1: Why do gluten-free bakers need specialized tools?
A1: baking without gluten is a unique challenge because gluten provides structure and elasticity in traditional baking. Without it, you need precise tools to measure ingredients, mix properly, and achieve the right texture. Specialized equipment helps ensure consistency, improves dough handling, and produces baked goods that are just as delightful as their gluten-filled counterparts.
Q2: What’s the first must-have tool for someone starting gluten-free baking?
A2: A reliable digital kitchen scale tops the list. Gluten-free flours and starches have different densities than wheat flour, and accurate measurement by weight rather than volume is crucial. This precision prevents gummy or dry results and helps maintain recipe consistency every time you bake.
Q3: Can I use my regular baking pans for gluten-free recipes?
A3: Absolutely! Your favorite baking pans-whether cake tins, muffin trays, or loaf pans-are essential staples and perfect for gluten-free treats. However, non-stick surfaces or silicone molds can be especially helpful to release delicate gluten-free baked goods that may not hold together as firmly.
Q4: How important is a dedicated mixing bowl set?
A4: Very important! Gluten-free batters often have different consistencies and require thorough blending of multiple flours and binders. Sturdy, non-reactive bowls in various sizes make mixing easier and help keep your kitchen organized. Stainless steel or glass bowls are great because they don’t retain odors or stain.
Q5: What role does a sifter or fine mesh sieve play?
A5: A sifter or sieve is invaluable for incorporating air into flour blends and for evenly combining powders like baking soda, xanthan gum, or baking powder. This step helps avoid clumps and improves the crumb texture, leading to lighter, fluffier baked goods.
Q6: Do gluten-free bakers need special mixers or attachments?
A6: While a handheld mixer or a stand mixer isn’t mandatory, they can be game-changers. Gluten-free dough often lacks the elasticity of traditional dough, so mechanical mixing ensures even hydration and smooth batter. A paddle attachment is preferred since it blends ingredients without overworking them.
Q7: What about baking sheets and parchment paper-are they essential?
A7: Yes! Baking sheets are the backbone of many gluten-free recipes like cookies, crackers, and flatbreads. Pair them with parchment paper or silicone baking mats to prevent sticking and simplify cleanup. These liners maintain the integrity of your delicate creations without the need for excess grease.
Q8: Is investing in a high-quality oven thermometer worthwhile?
A8: Definitely. Gluten-free baking is all about precision,and oven temperatures can vary wildly from the dial setting. An oven thermometer lets you monitor the exact heat, ensuring your breads don’t dry out or your cakes don’t collapse-consistent temperature is key for successful gluten-free baking.
Q9: Are there tools to help with gluten-free dough consistency?
A9: Yes-dough scrapers and bench scrapers are simple yet effective tools. They help you handle sticky, frequently enough wetter gluten-free doughs without frustration. These tools also assist in folding, cutting, and portioning dough cleanly.
Q10: Can specialty gadgets improve gluten-free baking outcomes?
A10: Absolutely! Items like silicone molds for muffins, bread cloches that trap steam, and even humidifiers that maintain moisture in your kitchen can elevate the quality of your gluten-free breads and pastries. The right gadgets help replicate conditions that gluten usually provides naturally.
Embracing gluten-free baking is a appetizing journey, made smoother with the right toolkit. With these essentials at your fingertips, your well on your way to creating scrumptious, gluten-free masterpieces that everyone will love!
Final Thoughts
With the right tools in hand, gluten-free baking transforms from a daunting challenge into a delightful adventure. Whether you’re mastering the perfect almond flour blend or crafting airy, tender loaves that amaze even gluten-loving friends, these essentials are your trusty companions on the journey. Embrace the process, experiment with confidence, and watch your kitchen become a haven where gluten-free creations rise, shine, and thrive. After all, great baking isn’t just about what you leave out-it’s about the tools that bring your delicious vision to life.