

In a world where dietary needs and culinary creativity frequently enough collide, the quest for the perfect loaf of bread can feel like an uphill journey-especially when yeast and gluten are off the table. Enter the art of crafting yeast-free, gluten-free bread at home: a rising trend that transforms humble ingredients into warm, satisfying slices of comfort. Whether you’re navigating allergies, experimenting with new textures, or simply seeking a wholesome choice, mastering this bread-making craft invites you to rise above restrictions and embrace a fresh, flavorful approach to baking. Join us as we explore the secrets, tips, and science behind creating flavorful, yeast-free gluten-free bread right in your own kitchen.
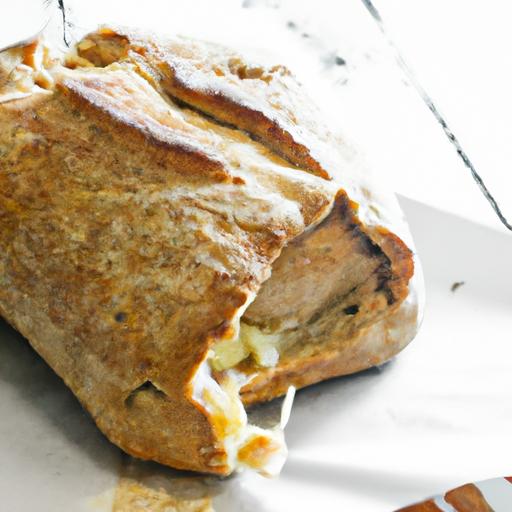
Rise Above: Crafting Yeast-Free Gluten-Free Bread at Home unlocks the art and science of baking bread that embraces those with gluten sensitivities or those seeking simpler, yeast-free alternatives.This journey delves into crafting soft, airy loaves by understanding how different gluten-free flours interact, harnessing natural leavening agents to achieve perfect rise, and mastering hands-on techniques for delightful textures and flavors without traditional yeast.
Prep and Cook Time
- Preparation: 20 minutes
- Resting & Rising: 1 hour
- Baking: 45 minutes
- Total Time: 2 hours 5 minutes
Yield
1 medium loaf (approximately 12 slices)
Difficulty Level
Medium – Requires attention to detail in mixing and fermentation times
Ingredients
- 1 cup brown rice flour, sifted for smoothness
- 3/4 cup tapioca starch (adds chewiness and elasticity)
- 1/2 cup almond flour (for moisture and flavor depth)
- 1 tablespoon flaxseed meal (activated in water to create binder)
- 1 1/2 teaspoons baking powder (natural rise)
- 1 teaspoon baking soda (boosts leavening with acidic components)
- 1 1/4 teaspoons cream of tartar (helps with lift and tenderness)
- 1 teaspoon sea salt
- 2 teaspoons apple cider vinegar (natural acid to activate rise)
- 1 1/4 cups unsweetened almond milk, warmed to 100°F
- 3 tablespoons coconut oil, melted and cooled slightly
- 1 tablespoon honey or maple syrup (optional, for slight sweetness)
Instructions
- Activate the flaxseed binder: in a small bowl, combine the flaxseed meal with 3 tablespoons of warm water.Stir and let sit for 10 minutes until gel-like consistency forms.
- Mix dry ingredients: In a large mixing bowl, whisk together brown rice flour, tapioca starch, almond flour, baking powder, baking soda, cream of tartar, and salt until fully integrated.
- Combine liquids: In a separate bowl, whisk almond milk, apple cider vinegar, melted coconut oil, honey (if using), and the prepared flaxseed gel.
- Create the dough: Pour liquid mixture into the dry ingredients. Using a spatula or wooden spoon, fold gently until a thick, somewhat sticky batter emerges-avoid overmixing to maintain lightness.
- Prepare the pan: Lightly grease an 8×4-inch loaf pan with coconut oil or line with parchment for easy removal.
- First rise/rest: Transfer batter to the loaf pan, smoothing the top. Cover loosely with a clean towel and let rest at room temperature for 45 to 60 minutes. Watch for slight puffing-this natural leavening develops air pockets.
- Bake the bread: preheat oven to 350°F (175°C). Bake the bread in the center rack for 40-45 minutes. The crust should turn golden-brown and a toothpick inserted in the middle should come out mostly clean with a few moist crumbs.
- cool properly: Remove bread from oven and let rest in the pan for 10 minutes before transferring it to a wire rack to cool entirely. This helps any residual steam to escape, preventing sogginess.
- Slice and enjoy: Use a serrated knife for neat slices to showcase the tender crumb achieved without yeast.
Tips for Success When You Rise Above: Crafting Yeast-Free Gluten-Free Bread at Home
- Flour balance is key: Experimenting with the ratios of rice flour, tapioca starch, and almond flour creates a well-rounded texture-too much tapioca may result in gumminess, while excess almond flour adds dense moisture.
- Natural fermentation boost: The apples cider vinegar and cream of tartar react with baking soda, serving as a natural leavening system to deliver volume without yeast.
- Temperature matters: Warm almond milk encourages the activation of chemical leaveners. Avoid hot liquids which may kill the binding effect of flaxseed gel.
- Patience with resting: Unlike yeast bread, yeast-free gluten-free dough relies on time for gentle aeration. Resist the urge to rush this step for fluffier results.
- Storage: Wrap cooled bread tightly in plastic wrap or store in an airtight container. It keeps fresh up to 3 days at room temperature or freezes beautifully for up to 2 months.
Serving Suggestions
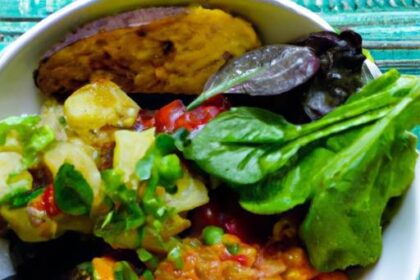
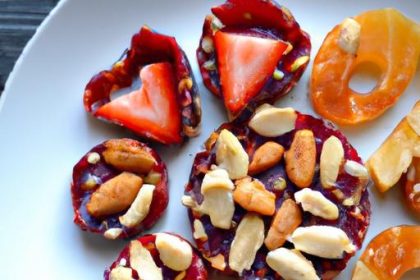
This yeast-free gluten-free bread shines when toasted lightly and topped with avocado slices, a drizzle of extra virgin olive oil, and cracked black pepper. For a cozy twist, spread with creamy hummus and sprinkle toasted sesame seeds. Its mild nutty flavor pairs beautifully with fresh herb butters,smooth nut butters,or a chilled bowl of coconut yogurt and berries for breakfast. Garnish with fresh thyme or rosemary sprigs to add an aromatic visual element that complements the loaf’s wholesome earthiness.

| Nutrient | per Slice (12 slices/loaf) |
|---|---|
| Calories | 110 |
| Protein | 3 g |
| Carbohydrates | 15 g |
| Fat | 5 g |
| Fiber | 2 g |
For additional inspiration on gluten-free baking techniques, check out our Gluten-Free Baking Tips Guide. For deeper understanding of gluten-free flour science and leavening, the ScienceDirect Food Science Hub offers excellent research-backed insights.
Q&A
Q&A: Rise Above – Crafting Yeast-Free Gluten-Free Bread at Home
Q1: Why choose yeast-free bread when going gluten-free?
A1: Yeast-free bread offers a gentler option for many people sensitive to yeast or those who simply prefer a more natural fermentation process. Gluten-free diets can be tricky,and yeast sometimes adds an unwanted tang or digestive challenge. Crafting bread without yeast allows you to embrace a fresher, subtler flavor profile while keeping your tummy happy.
Q2: If I’m not using yeast, what makes the bread rise?
A2: Great question! instead of relying on yeast, many recipes use baking soda, baking powder, or natural sourdough starters made from gluten-free grains. These ingredients introduce carbon dioxide bubbles during baking, giving bread an airy, tender texture without the need for yeast fermentation.
Q3: What gluten-free flours work best for yeast-free bread?
A3: The stars of the show are often rice flour, tapioca starch, sorghum flour, and almond flour. Each adds a unique texture and flavor. such as, tapioca starch brings chewiness, while sorghum offers a mild, slightly sweet note.Blending different flours helps mimic the structure and moisture-retaining qualities of wheat flour.
Q4: How can I ensure my yeast-free gluten-free bread doesn’t turn out dense or crumbly?
A4: Balance is key! Combining the right flours, adding moisture through ingredients like applesauce or mashed bananas, and incorporating binders such as xanthan gum or psyllium husk powder help create structure. Also, don’t skip resting the batter before baking-this allows flours to hydrate fully, leading to a better crumb.Q5: Can I customize the flavor of my bread without using yeast?
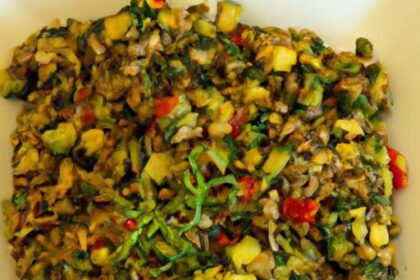
A5: Absolutely! Herbs,seeds,nuts,and gluten-free grains like quinoa or millet can all elevate your loaf into a flavor adventure. Adding spices such as cinnamon or garlic powder lets you experiment with sweet or savory twists, turning your loaf into a unique taste experience.
Q6: How long does yeast-free gluten-free bread keep fresh?
A6: Because it lacks preservatives and yeast, this bread is best enjoyed within 2-3 days when stored in an airtight container at room temperature. You can also freeze slices for longer storage-just toast or warm them up when ready to eat.
Q7: Is baking yeast-free gluten-free bread more time-consuming than traditional bread?
A7: Surprisingly, it can be quicker! Yeast-free recipes skip the long proofing times, so your dough goes straight into the oven after mixing and resting briefly. This means fresh homemade bread can be on your table in under an hour.
Q8: What kitchen tools make the process easier for baking this type of bread?
A8: A good quality mixing bowl, a sturdy whisk or spatula, and a loaf pan are essentials. For an extra edge, a kitchen scale ensures accurate flour measurements, while a timer helps you nail the baking times. Oven thermometers can also boost consistency by confirming your oven’s true temperature.
Q9: Can kids get involved in making yeast-free gluten-free bread?
A9: Definitely! The no-yeast method is wonderfully hands-on and forgiving, ideal for little bakers. Measuring, stirring, and decorating with seeds or nuts become fun activities that encourage kids to explore baking and nutrition.
Q10: What’s the biggest tip for someone just starting to bake yeast-free gluten-free bread?
A10: Embrace the journey with patience and curiosity. Every oven is different, and gluten-free flours can behave unexpectedly. Keep notes, tweak ingredients, and enjoy the process. With time, you’ll rise above challenges and bake bread that’s comforting, nourishing, and uniquely yours!
The Way Forward
Baking yeast-free, gluten-free bread at home is more than just a culinary challenge-it’s an opportunity to redefine what bread can be. With patience, creativity, and the right ingredients, you can craft loaves that are not only safe for sensitive diets but also rich in flavor and texture. As you rise above traditional baking boundaries, remember that each loaf tells a story of resilience and innovation. so grab your mixing bowl, trust the process, and enjoy the rewarding journey of creating bread that truly nourishes both body and soul.