

in a world where the aroma of freshly baked bread signals comfort and festivity, gluten-free baking has risen from niche necessity to joyful creativity. Whether you’re newly gluten-free or simply exploring healthier alternatives,mastering the basics of gluten-free baking can open a door to delicious,satisfying treats without compromise. This guide is your trusted companion, blending science and artistry to help you transform ordinary ingredients into remarkable baked goods. From understanding the essential flours and binders to tips that ensure perfect texture and flavor, get ready to embark on a baking adventure that’s as wholesome as it is mouthwatering. Let’s dive into the foundational secrets that will make your gluten-free kitchen a place of endless possibility and delight.
Gluten-free baking basics unlock a vibrant world of flours and ingredients that each bring their own charm to your kitchen creations. Understanding gluten-free flours and how they behave is pivotal to achieving that perfect texture and flavor-light, tender, or chewy-without sacrificing deliciousness. Whether you’re adapting a cherished family recipe or experimenting with new ones, mastering these essentials makes gluten-free baking accessible and exciting.
Prep and Cook Time
- Preparation: 15 minutes
- Cooking/Baking: 25-35 minutes (varies by recipe)
Yield
- Serves 8 (depending on recipe)
Difficulty Level
- Medium – small adjustments lead to big rewards
Understanding Gluten-Free Flours and Their Unique Properties
Each gluten-free flour tells a different story, crafted from ingredients like rice, almond, coconut, sorghum, or chickpeas. Rice flour acts as a mild, neutral base with a fine crumb, perfect for everything from cakes to cookies. almond flour provides moisture and a rich, nutty flavor but needs balance with lighter flours to avoid dense results. Tapioca flour shines as a binder and gives a beautiful bounce, mimicking the elasticity traditionally contributed by gluten. Recognizing these unique traits empowers you to blend and adjust flours to mimic your favorite textures while enhancing flavors.
Mastering Essential Ingredients for Perfect Texture and Flavor
Beyond flours, ingredients like xanthan gum or guar gum create the structure and chewiness gluten normally provides.Don’t overlook starches like arrowroot and potato starch,wich lighten crumb and improve moisture retention. When crafting your blend, the interplay between moisture (milk alternatives, yogurt, or oil) and these flours will define the final texture-silky, crumbly, or fluffy. Sweeteners, salt, and acid elements (like lemon or vinegar) each brighten and elevate flavor while balancing your batter or dough.
Tips for Adapting Traditional Recipes to Gluten-Free Success
Transitioning traditional baking with the right gluten-free baking basics requires patience and strategic swaps. A 1:1 gluten-free flour blend frequently enough works, but for best results, complement it with starches and gums to replicate gluten’s binding power. remember that gluten-free batters typically need slightly more liquid, given how these flours absorb moisture differently. Let your batter rest-at least 30 minutes-before baking to hydrate the flours fully. This step is a game-changer, improving texture and reducing crumbly results.
Troubleshooting Common challenges in Gluten-Free Baking
Common roadblocks like dryness, crumbling, or dense texture often stem from flour ratios or insufficient binding agents. If your baked goods feel dry or gritty, increase your fat content slightly or swap part of your flour for a finely ground nut flour. To prevent a gummy interior, avoid overmixing; gluten-free flours do better with gentle handling.Cooling entirely before slicing helps stabilize texture too. When in doubt,experiment with small batches and take notes-your perfect formula is just a few tweaks away.
Ingredients for the Perfect Gluten-Free Flour Blend
- 1 cup brown rice flour, sifted
- 1/2 cup tapioca starch
- 1/2 cup almond flour, finely ground
- 1 teaspoon xanthan gum
step-by-Step Instructions for Flour Blend Preparation
- Combine the brown rice flour, tapioca starch, and almond flour in a large mixing bowl. Use a whisk to evenly mix these dry ingredients, ensuring no clumps remain.
- Add the xanthan gum and continue whisking for about 30 seconds to distribute the binder evenly throughout your blend.
- Store your gluten-free flour blend in an airtight container, away from moisture and light. Use within a month for the freshest results.
- Tip: For baked goods requiring a lighter crumb, substitute 1/4 cup of the brown rice flour with sorghum flour to add subtle sweetness and enhanced tenderness.
Chef’s Notes: Tips for Success
- Experiment with flour blends. Every gluten-free flour contributes different textures. Mix and match to suit your recipe and taste preferences.
- Hydrate thoughtfully. let batters rest for at least 30 minutes before baking to allow flours to absorb liquids fully.
- Use gums sparingly. Usually 1 teaspoon per cup of flour blend is enough to provide the right structure-too much leads to unpleasant chewiness.
- don’t overmix. Gluten-free batters should be combined gently to preserve air and avoid dense or gummy textures.
- Temperature matters. Slightly warmer oven temps (5-10°F more) can help set structure earlier, improving rise in gluten-free recipes.
Serving Suggestions
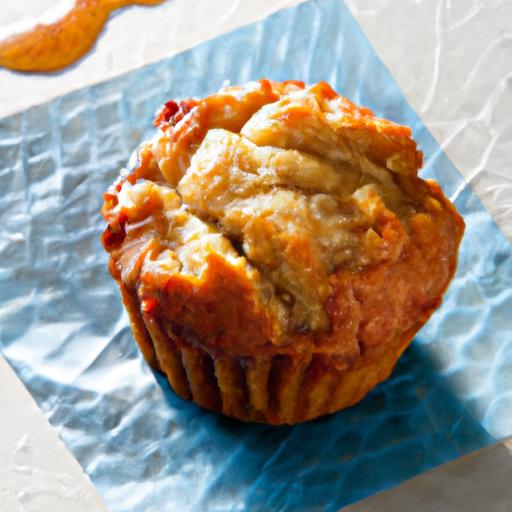
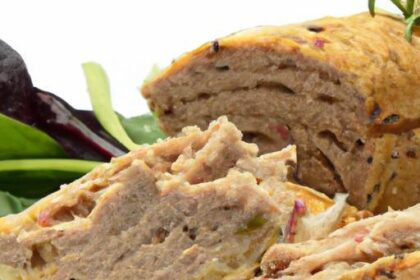
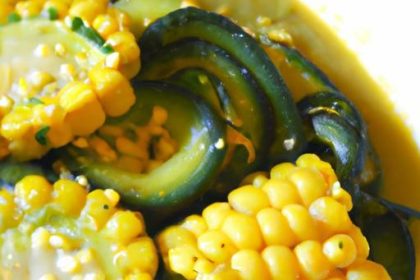
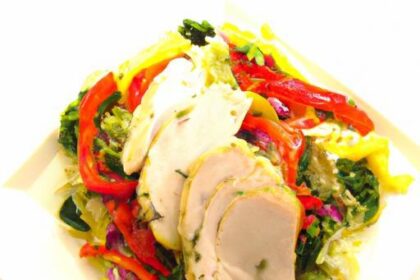
Gluten-free baked goods shine when presented with fresh, vibrant accompaniments. Serve warm muffins or swift breads with a smear of creamy almond butter and a drizzle of local honey.Dust cakes lightly with powdered sugar or fresh citrus zest for an extraordinary finish. For rustic breads, pair slices with avocado smash or a shining tomato salsa. A sprinkle of toasted nuts or seeds on top adds visual contrast and a satisfying crunch that complements the tender crumb perfectly.

| Ingredient | Calories | Protein (g) | Carbs (g) | Fat (g) |
|---|---|---|---|---|
| Brown Rice Flour (1 cup) | 365 | 7.5 | 76 | 2.2 |
| tapioca Starch (1/2 cup) | 200 | 0 | 50 | 0 |
| Almond Flour (1/2 cup) | 320 | 12 | 12 | 28 |
| Xanthan Gum (1 tsp) | 5 | 0 | 1 | 0 |
For further guidance on using gluten-free flours, check our detailed gluten-free flour guide. To dive deeper into ingredient science, visit the celiac Disease Foundation’s authoritative page.
Q&A
Q&A: Gluten-free Baking Basics – Your Guide to Delicious Starts
Q1: What makes gluten-free baking different from traditional baking?
A: Gluten-free baking swaps out the protein network that gives traditional baked goods their structure and chew. Without gluten, you’ll rely on alternative flours and binding agents to create texture and hold everything together. This means mastering the art of balance-hydration, leavening, and mixing become even more crucial to turn your gluten-free batter or dough into a delicious masterpiece.
Q2: Which gluten-free flours are best for beginners?
A: Great question! Rice flour, almond flour, and oat flour are fantastic starting points as they’re widely available and have mild flavors. Many bakers start with a blend of these to mimic the texture of wheat flour. ready-made gluten-free flour mixes can also save time-they’re designed to work well in most recipes without a lot of tweaking.
Q3: how do I get that perfect rise in gluten-free cakes and breads?
A: Without gluten’s stretchy network,you’ll want to incorporate extra leavening agents like baking powder,baking soda,or yeast,depending on your recipe.Adding ingredients like xanthan gum or guar gum can mimic gluten’s elasticity and trap gas bubbles,giving your baked goods a fluffier texture. Also, don’t skimp on proper mixing and proofing times-it’s all about patience and precision.
Q4: Can I substitute gluten-free flours 1:1 for wheat flour in my favorite recipes?
A: Not quite. Gluten-free flours behave differently,frequently enough absorbing more moisture and lacking elasticity. You’ll usually need to adjust liquid ratios and add binding agents. Experimenting with flour blends rather than single flours frequently enough yields the best results. It’s like crafting your own signature flour mix that suits the recipe’s needs.
Q5: What role do eggs play in gluten-free baking?
A: Eggs act as natural binders, enrichers, and leavening agents, supercharging your gluten-free recipes. When baked goods lack gluten’s glue, eggs help hold everything together and add moisture and structure.If you’re vegan or allergic, flax eggs or chia seeds soaked in water can mimic these effects quite well.
Q6: How can I keep gluten-free baked goods from drying out too quickly?
A: Gluten-free treats can be more delicate and prone to drying out. To combat this, add ingredients that lock in moisture-like applesauce, yogurt, or mashed bananas. Also,store your baked goods tightly wrapped or in airtight containers,and consider freezing extras to maintain freshness.
Q7: Are gluten-free baked goods suitable for everyone to enjoy?
A: Absolutely! While gluten-free baking is essential for those with celiac disease or gluten intolerance, these goodies can also delight anyone curious about diverse flavors and textures. Gluten-free recipes frequently enough emphasize real, wholesome ingredients, making them a tasty and inclusive choice at any table.
Q8: What are some common pitfalls to avoid in gluten-free baking?
A: One common trap is treating gluten-free baking exactly like traditional baking-this often leads to crumbly or dense results. Avoid skipping binding agents, under-hydrating your dough, or neglecting resting times. Lastly, patience is key: experimenting, tasting, and tweaking will lead you to your perfect gluten-free bake.
Q9: Can I make gluten-free bread as fluffy and airy as wheat bread?
A: With some practice, yes! Gluten-free bread requires a thoughtful balance of flours, hydrators, and binders. Techniques like longer fermentation,adding psyllium husk powder,or using sourdough starters can improve texture and flavor immensely. While it’s a bit of an art, the result can be just as satisfying.
Q10: Where should I start if I’m new to gluten-free baking?
A: Start simple! Try easy recipes like muffins, cookies, or pancakes using pre-made gluten-free flour blends.Focus on understanding how ingredients interact rather of racing to copy traditional recipes.As you gain confidence, experiment with flour combinations and more complex baked goods-the gluten-free world is vast and delicious!
In Retrospect
Embarking on your gluten-free baking journey may seem like stepping into uncharted territory, but with these basics at your side, you’re more than equipped to create treats that are as delightful as they are safe. Remember, gluten-free baking is as much about creativity as it is about science-experimenting with flours, mastering textures, and embracing the little quirks that make each recipe truly your own. So, gather your ingredients, preheat that oven, and let your kitchen become a haven where delicious starts transform into unforgettable bites. Here’s to baking freedom, one gluten-free creation at a time!