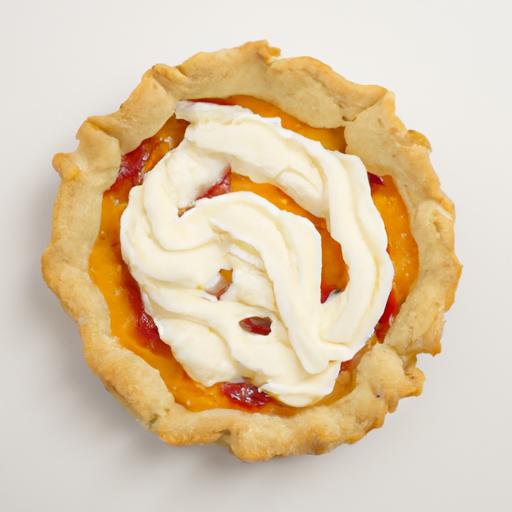


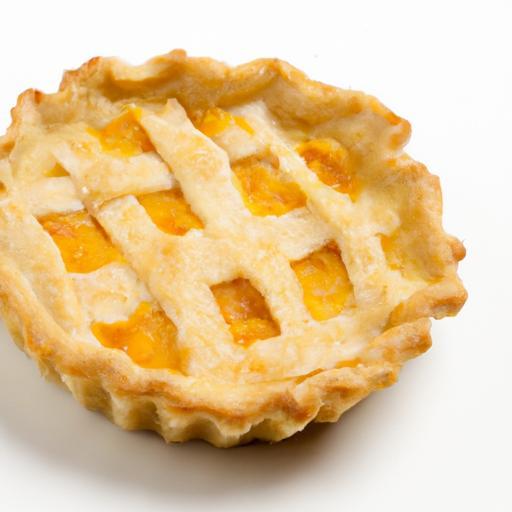
There’s an alchemy to Gluten-Free Tart Shells—their delicate, buttery layers that melt on your tongue, forging the perfect foundation for any filling, from zesty lemon curd to rich chocolate ganache. But when gluten is off the table, this golden standard becomes a culinary puzzle. Fear not, adventurous bakers: crafting perfect Gluten-Free Tart Shells is not only possible, it’s an art waiting to be mastered. In this article, we’ll unravel the secrets behind achieving that irresistible crispness and tender crumb, guiding you step-by-step through the magic of Gluten-Free Tart Shells. Prepare to transform your tart game from good to downright fabulous—with Gluten-Free Tart Shells that impress every time.
Flaky & Fabulous: Crafting Perfect Gluten-Free Tart Shells
Flaky & fabulous: crafting perfect gluten-free tart shells begins with understanding the distinct personalities of gluten-free flours and how they shape the texture of your tart crust. Without gluten’s natural elasticity,choosing the right blend of flours can mean the difference between crumbly,dense,or delightfully tender pastry. I remember the first time I tackled a gluten-free tart shell-I was amazed at how petite changes in flour ratios and fat handling transformed the crust into a golden, crisp, melt-in-your-mouth masterpiece.
Prep and Cook Time
- Planning: 25 minutes
- Chilling: 1 hour
- Baking: 20 minutes (blind) + 15 minutes (with filling)
Yield
One 9-inch tart shell, serving 8
Difficulty Level
Medium – perfect for bakers ready to elevate their gluten-free pastry skills
Ingredients
- 1 cup gluten-free all-purpose flour (ensure it contains xanthan gum or add 1/4 tsp separately)
- 1/3 cup almond flour (for added tenderness and moisture)
- 1 tbsp sugar (to balance flavors)
- 1/4 tsp fine sea salt
- 1/2 cup unsalted cold butter, cubed
- 1 large egg yolk
- 2-3 tbsp ice-cold water (adjust as needed)
Instructions
- Mix the dry ingredients: In a large bowl, whisk together the gluten-free all-purpose flour, almond flour, sugar, and sea salt until well combined. This blend balances structure and tenderness, essential for flaky & fabulous gluten-free tart shells.
- Cut in the cold butter: Add the cubed cold butter to the flour mixture. Using a pastry blender or your fingertips, work the butter into the flours until you achieve pea-sized clumps, leaving some larger bits for that signature flaky texture.
- Incorporate egg yolk and water: Beat the egg yolk lightly and add it to the mixture. gradually add ice-cold water, one tablespoon at a time, mixing gently just until the dough starts to come together. Avoid overworking it-this preserves tenderness and prevents a tough shell.
- Form the dough: Gather the dough into a ball, flatten it into a disc, than wrap tightly in plastic wrap. Chill in the refrigerator for at least 1 hour to firm up fats and hydrate the flours.
- Roll out the dough: Lightly flour a clean surface with gluten-free flour.Roll the chilled dough into a circle about 12 inches in diameter, rotating often to prevent sticking or tearing. Use minimal pressure to keep the dough cold and flaky.
- Transfer to tart pan: Gently lift and fit the dough into a 9-inch tart pan with a removable bottom. Press the dough evenly into the edges and trim any excess with a sharp knife.Chill again for 20 minutes to help retain shape during baking.
- blind bake the shell: Preheat the oven to 375°F (190°C). Line the tart shell with parchment paper and fill with pie weights or dried beans. Bake for 20 minutes, then remove weights and bake for another 10-15 minutes until golden and crisp. This step is crucial to avoid sogginess.
- Cool and fill: Allow the crust to cool fully before adding your chosen filling. this ensures your flaky & fabulous gluten-free tart shell stays crisp and beautifully textured.
Tips for Success
- Flour selection: Blending gluten-free flours like rice, tapioca, and almond flour creates tender, flaky layers. Avoid single-flour doughs for best results.
- Butter temperature: Use butter as cold as possible, even slightly frozen, to preserve pockets of fat that melt during baking, yielding flakiness.
- Minimal handling: Handle dough lightly and keep it cold throughout to prevent melting butter prematurely and developing toughness.
- Chilling is critical: Don’t skip chilling steps-they allow the flours to hydrate fully and the fats to chill, lending structure and crispness.
- Prevent sogginess: Blind bake properly,and consider brushing the cooled shell with a thin layer of melted chocolate or egg white before filling to create a moisture barrier.
- Make-ahead: Prepare dough up to 2 days ahead, tightly wrapped and refrigerated, or freeze for up to 1 month.
Serving Suggestions
Present your tart with fresh seasonal fruit to complement the buttery crust, or garnish with a dusting of powdered sugar and fresh mint sprigs for an elegant touch. For savory versions, consider lining the tart shell with caramelized onions or herbed cream cheese before filling.

Nutritional details (Per Serving)
| Calories | protein (g) | Carbohydrates (g) | Fat (g) |
|---|---|---|---|
| 210 | 3 | 16 | 15 |
For more tips on gluten-free baking,check out our Gluten-Free desserts Guide and visit Celiac Disease Foundation for expert advice on gluten-free living.
Q&A
Q&A: Flaky & Fabulous – Crafting Perfect Gluten-Free Tart Shells
Q: Why is making a gluten-free tart shell challenging compared to conventional ones?
A: Gluten provides elasticity and structure in traditional doughs.Without it, gluten-free tart shells tend to be crumbly or too dense. Achieving that delicate, flaky texture requires a balance of substitute flours, fats, and techniques to mimic gluten’s binding properties.Q: What are the best gluten-free flour blends for tart shells?
A: A combination of rice flour,tapioca starch,and almond flour creates a marvelous base. Rice flour provides structure, tapioca starch adds chewiness and stretch, and almond flour contributes richness and a tender crumb, essential for that perfect flaky texture.
Q: How can I keep my gluten-free tart shell from becoming too dry or crumbly?
A: Moisture and fat are your friends here. Using cold butter or dairy-free alternatives helps create flaky layers. Incorporating a bit of xanthan gum or psyllium husk powder can also help bind the dough. Remember to avoid overmixing; it shoudl come together just enough to hold.
Q: Is chilling the dough really necessary?
A: Absolutely! Chilling solidifies the fats and helps relax the dough, preventing shrinkage and cracking during baking. it also enhances the flakiness as the cold butter melts and steams, creating those signature layers.
Q: Can I roll out gluten-free dough the same way as regular dough?
A: Gluten-free dough is a little more delicate and less elastic. Lightly dust your surface with gluten-free flour and use gentle,even pressure. Rolling between two sheets of parchment paper can prevent sticking and make transferring the dough easier.
Q: How do I prevent my gluten-free tart shell from shrinking in the oven?
A: Proper chilling is key, as well as avoiding overworking the dough. Blind baking with pie weights (like dried beans or ceramic beads) ensures the dough holds its shape. Pricking the base with a fork can reduce bubbling, too.
Q: What are some creative ways to add flavor to my gluten-free tart shell without compromising texture?
A: Ground nuts, citrus zest, or a pinch of aromatic spices like cinnamon or cardamom can be whisked into the dry ingredients. Just be careful not to add too much liquid or overpower the tender crumb you’re aiming for.
Q: Should I use butter or oil in a gluten-free tart shell?
A: Butter is ideal for flakiness and flavor, especially when kept cold. Oils tend to create a more crumbly, biscuit-like texture. For dairy-free options, solid coconut oil works well, but keep it chilled to mimic butter’s properties.
Q: How long and at what temperature should I bake a gluten-free tart shell?
A: Typically, bake at 350°F (175°C) for 15-20 minutes when blind baking until golden. Adjust timing slightly depending on your oven and the dough thickness. Keep an eye so it doesn’t burn-the color is a good indicator of doneness.
Q: Can gluten-free tart shells be made ahead?
A: definitely! You can prepare the dough and freeze it for up to a month. Thaw gently in the fridge before rolling out. Partially or fully baked shells also keep well when stored airtight, making your dessert prep even easier.
Crafting gluten-free tart shells is an art blending science and creativity. With the right ingredients and some patience, you’ll enjoy flaky, fabulous results every time!
Wrapping Up
As you embark on your gluten-free baking journey, remember that achieving flaky, fabulous tart shells is as much about patience and technique as it is about quality ingredients. With each precise fold, chilled rest, and gentle press, you’re crafting more than just a crust-you’re creating a foundation for endless culinary creativity. Whether you’re filling your tart with vibrant fruits,rich custards,or decadent chocolates,these perfectly crafted shells will elevate every bite to a celebration of texture and taste. So, embrace the art of gluten-free baking with confidence-because flaky perfection is always within your reach.